A Glittery Goodbye

Time:  1 hour
Cost:  $
Difficulty:  7/10
Overall Ranking:  7/10

So, this is the end (for now).
va1t6

Hold on for me to get through my ever-so-deep farewell on why these blogs mean the world to me, and I promise my last project will come through.

I would describe this semester as challenging, blinding, straining, and breaking.  But, I’ve learned one thing through it all – that it’s okay to be broken.  Every week, there was a peppy, sarcastic, quirky chunk of me plastered out onto the Internet, and, needless to say, I’m still not put together.  There’s a common phrase that time heals all wounds, but, frankly, no.  No, it doesn’t.  Time makes emotions, heartbreak, disappointment, and all things negative foster, while goodness comes to an end.  Time has nothing to do with putting anything back together again, nor can contain ultimate goodness.

If that was the case, then each of these projects, old antiques, balls of twine, and buckets of glue wouldn’t need me to hang around for DIY projects.  DIY projects are nothing more than brokenness come together for something beautiful, even if we never expected the outcome.

I believe it’s okay to be broken.  I believe that there is Someone who can make us whole.  I believe that we’re all just DIY projects before Someone, who can make us into something beautiful we never imagined.  So, it’s okay to be broken because if you keep your eyes open, you never know when you might see the masterpiece.

This week, I decided to make a snow globe, but there isn’t real/fake snow in it.  I decided right now to call it a glitter globe, but that was spontaneously made up, so don’t poke too much fun.  I spent a lot of time deciding what to put in my homemade mason jar glitter globe.  I even asked around.  Here are some responses:  a cold heart, Jesus, a haunted house, a snow globe.  Thanks to those who contributed, but no one suggested dirt.

jarofdirt

I grabbed an old mason jar and used stick glue to cover the lid in extra fine topaz glitter.  I also found wire that said, “Smile,” in cursive.  I paced down the aisles of Home Depot trying to decide what to put in my jar of wonder.  I happened upon some copper pipe things that I thought looked pretty cool, and that’s when I decided to go to an industrial look.

I finally decided on grabbing two screws of different sizes and tying them together with copper wire to make a cross.  I used waterproof glue/cement to cover the pieces and some type of wrench thing from my dad to stick the items through the jar opening.  You would never believe how hard it is to glue things inside of a mason jar.  Don’t get your hand stuck, not that it happened to me, just a suggestion.

I added water and glitter and PERFECT.  I now have my own little reminder that no matter how many times my life gets flipped around, in the end, I have something concrete – a cross.

And so, I’ll close by saying, I would not only highly recommend this project, but I would especially hope that you know what you would put in a glitter globe if you were making one.  I also encourage my readers that no matter how broken you start, eventually, you’ll be DIYed.  And, it’s not like it’s happening on accident, just like none of mine were, as each have their own lesson.

This slideshow requires JavaScript.

The sides have been chosen, my friends.  Now, I know you want to know where I’m going next.  You actually might not, but I have to tell you for my class, so listen.  One of my favorite songs goes, “We crawl through the abyss, then we came through the other side.”  That’s right.  I’m on the rise again.  I’m going to an internship next semester.  I have to be more serious than I was here, so I’ll be shutting down my blog for at least the semester.

If I decide to start it up again, I’ll be sure to let you know FIRST.  But, until then, don’t be shy to give me tips and changes you would suggest in the comments section.  Also, I would highly encourage you to start up your own blog.  It might be fun.  Might not.  Who knows what the future holds, kids?  Time to experience it.

And don’t just pin anything decent looking.  Dream it.  Do it. Achieve more than you imagined.

Powdered to Perfection Funnel Cakes

Time:  30 minutes
Cost:  $$
Difficulty:  5/10
Overall Ranking:  9/10

Fried chicken, fried potatoes, onion rings, hush puppies, potato chips, and more fried, fried, fried foods.

Luckily for you, I’m not a health nut.  That’s right, people; I made my own homemade funnel cakes today.  All cakes are meant for me to eat, but this cake – this cake is meant for me to love.

funnelcakecollage

Homemade funnel cakes have been my dream creation since as long as I can remember, so I dared to commit to it this week as one of my last DIY projects (but surely not the last).  I’m almost as committed to this as I was to Josh Golden and the Jonas Brothers in middle school.  Since this project is so simple, I decided to also throw in this post some easy tips on creating your own DIY projects in general.  Two-in-one got me like:

jonas

  1. Pick something that you actually want to do and have use for.
    There are plenty of great pins on Pinterest!  If you want melted crayon art, get your hairdryer ready.  If you have a dream to be eating fried sugar while watching Project Runway reruns (like me), get out the skillet.  Be inspired, and don’t take no for an answer.
  1. Be creative with your materials.
    Tonight, I combined your everyday combination of milk, eggs, vanilla, sugar, flour, salt, and baking soda (and extra, supreme extra, butter).  The typical.  But, let’s just say you live in, I don’t know, northern Missouri, and there isn’t a craft store nearby.  Don’t be afraid to revamp or modify the original pin.  You won’t be able to find the exact replica, but your version will be better anyway, I’m sure.
  1. Take risks.
    As soon as I mixed my bowl of Heaven together, I threw it on to the bubbly oil in a skillet.  That takes real guts.  And, you can bet that gut got bigger after this project. Needless to say, you can’t be shy around potential funnel cakes.  If you’re really scared of using a certain kind of material, search for alternatives that would be safer, such as wood glue instead of a power drill.
  1. Be patient.
    I flipped my funnel cake too early out of pure childlike excitement and lost some of it.  LAME.  Don’t be me.  Don’t rush perfection.
  1. Personalize it.
    After the funnel cake is done, you can add anything you want – powdered sugar, chocolate syrup, ice cream, or fruit (but I’ll judge the healthy status)!  Whether it is tasty food or another DIY project, there are always ways to add initials, pictures, or your own personal touch.  This will make the project mean even more to you and the project more fun.
  1. Share.
    What’s life without those to share it with?  Make sure to include others in your endeavors, or use DIY projects as Christmas present inspiration.  You never know who you might inspire.

Overall, I wasn’t exaggerating on the gut comment.  The funnel cake project was superb, and I would definitely encourage you all to try making your own carnival at home, even if I did originally scream at the bubbling skillet.  This project didn’t take hardly any time, and it’s actually a lot easier than it looks!

Go for it.  You know you’re craving some sweets.  While you’re at it, add your own helpful DIY tips in the comment section below or message me on my Facebook page.

Home is Where the Heart Is

Time:  Your entire life (4+ hours)
Cost:  $$
Difficulty:  8/10
Overall Ranking:  8/10

Have you ever tried to caulk? Have you ever tried to caulk on less than three hours of sleep to Channing Tatum talking about cheese? This is the story of a curly-haired girl with a sequined shirt learning how to caulk some wood.

I was super inspired by my hometown of Ste. Genevieve this week because, on Tuesday, I’ll be traveling back for Thanksgiving. But first, I’m heading to Chicago for yet another conference. You could say I’m getting a bit homesick with all the traveling. A wise man once said, “It don’t matter where we go, we’ll always find our way back home.”

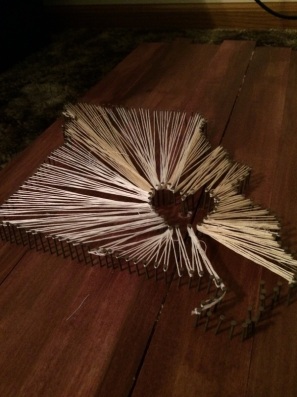
So, today, I tested this theory with my string art project. Does that make it a string theory? I went by Home Depot and got five planks of wood, caulk, and stain. I choose the color “barn red” because it’s my mom’s favorite, and I miss her. I then stuck the pieces together with the caulk and began to stain the wood. When I lifted the newly formed canvas, it broke in half. I spent hours of caulk, concrete glue, and even duct tape trying to get it to stick. It was like a group project. No matter how hard you tried to keep it together, no amount of glue can keep it from falling apart.

showmestate

Next, print out a map of Missouri, and a small heart. Cut them out and tape them down on the boards. Take small nails and outline the map with them. Make sure to hammer them until they aren’t wobbly. Once all the nails are in, take off the map and heart.

Tie the string to one of the nails and alternate wrapping it around the inside and outside nails. I ran out of string with four strands from Walmart, but it was 1:30 a.m., so I couldn’t finish.

The string art itself was not difficult and looks incredibly awesome, but the wooden canvas still doesn’t stick, which makes the piece impractical. I don’t like impractical things. If I could change this project, I would definitely pick another method to do the canvas.

I’m not going to stress over it, though. Just because something doesn’t stick together doesn’t mean it’s not beautiful (foreshadow). Plus, I’ll be eating deep dish pizza in less than 12 hours.

If you like the urban rustic feel of this project or if you know how to stick wood together, let me know in the comments section. I’ll see you after break, kiddos!

Bold Necklaces and the Hollywood Dream

Time:  1 hour
Cost:  $
Difficulty:  6/10
Overall Ranking:  7/10

“Ambition must be made to counteract ambition.”  What Madison was really trying to say was, “Be sassy.  Wear great sunglasses.  Pursue greatness.”  Or was he imitating Goofy?

So, that’s what I did.  I shipped myself to sunshine and surf out west for a conference at the Reagan Ranch in Santa Barbara, California.  I know you were probably expecting Weezer references and songs referring to sunshine today.  Literally, just flew in, and only still awake because I have to do this blog for a class, but I also needed to tell you that my face almost gotten eaten by a photobombing horse (but that picture is too embarrassing for blog material).

CaliCoastline

One of my main takeaways from the conservative activist conference was to stand up for your beliefs, even when it is not easy.  Put on your shades, and let the sass seep through your pores.  This inspired me to make my own bold statement necklace to stand out with style.

necklacecollage

The major focus of this project is the beads, so I scoured my small Midwestern town for such gems on a Friday night because that’s just how social I am.  I started with running down the aisles of Walmart, screaming, of course.  Nothing.  Well, we are young ladies.  Young ladies don’t get their beads for Walmart.  Where’s the class in that?

So, then, I tried Dollar Tree, and the Dollar Store, and Walgreens.  I’m writing a book now, “Searching for Beads in Kirksville – A Personal Narrative of Struggle and Redemption.”  Yes, that’s right – REDEMPTION.  I finally resorted to picking out beads from Walmart.  Stick it to the man? No, the man definitely won this one.  I decided to choose beads for the shape, rather than color, and spray paint them bright red.

I never spray painted anything until this project, but I’m scarred for life after the amount of red paint covering my hands and grass.  It looked like a gory mess.  I tried two different types of spray paint, and both of them were a complete mess.  I eventually decided to paint the beads blue from the paint I used for my window home decor blog.  This is what I should have done first.  This is what you should do first.  Paint the beads by hand.

Once you find beads (or paint them three times, like I did), use the small wires to connect the beads together.  You may have to lay out the necklace design, but this will prove difficult when the actual beads are hooked together.  The structure may change as you are adding beads.  Connect them to a chain and, tah dah, you have your own statement necklace.

I like this project because the necklace is cute and practical.  With the right set of wire tools, forming the wire isn’t too bad.  The only struggle I had with the project was finding beads and making them look classy enough to look like more than just beads.  Therefore, I liked this project, but it wasn’t one of my top picks either.

Did you make your own DIY project necklace?  Share pictures on my Pinterest site!

A Hoot ‘n’ Holla

Time:  2 hours, excluding dry time
Cost:  $
Difficulty:  2/10
Overall Ranking:  8/10

Earth is important. Mother Earth.  Earthy vibes.  My Homeland.

owl1

I’m not very much of an environment person, but I respect where I live.  Not because I live there, but because it must have taken a lot of love to create it.  I remember, in high school, I had to make a dollhouse, complete with clay dolls and whatnot.  Well, that made me want to rip out my hair, so I can’t imagine the amount of thought God put into me and the microscopic planet on which I live.  But, back on topic.

Have you ever noticed how many birds there are outside?  There are a lot of birds.  I don’t know how many birds, but there are a lot of those little Audubon society-lovin’, French fry-eatin’, original tweeters.  There’s this song called “Fly On” by Humming House that is absolutely perfect at describing my thoughts on birds.  The lyrics are, “As we fly on, fly on, just like we always do.”  This really encompasses birds because they can just take off and fly and not give two-cents about being held down.  Birds – they’re chill, I tell ya.

scuttle

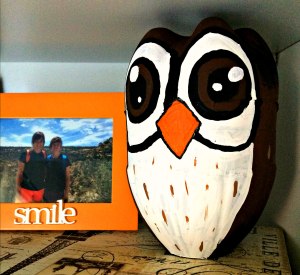
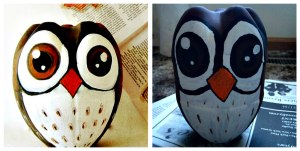
If I were to be an animal, I’d probably be a bird, so why not make a little friend of my own?  Here, I introduce Roanoke, the recycled owl.

owlcollage

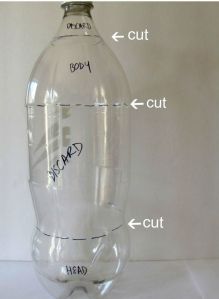
This project is relatively simple and inexpensive.  Let your friends throw a house party and steal all of their empty soda bottles when they turn away.  (Thanks, roomies).  Outline with a permanent marker where the cut lines are, as shown at the original pin site.

cutlines

Match up the ends, and wrap tape around the attachment.  Make sure to keep the tape from wrinkling.  Roanoke looks pretty old ‘cause I didn’t do that.

Paint the entire body a dark brown.  You may have to add an extra layer, and it might look weird, but I promise he’s adorable in the end.  Add white circles for eyes, outline them in black, and paint his white belly.  Add the extra elements, like a faded black bottom, feathers, a beak, and pupils.  He shall look ravishing.

I would definitely recommend this project, and I should certainly be making more Baby Roanokes for my friends in the near future.  The project is relatively inexpensive, especially if you already have the paint from other projects, like I did.  The owl is a nice addition to my humble abode, as far as being adorable as well.

Have you seen something on Pinterest that you would like me to try out?  Send me some of your favorite DIY pins on my official Pinterest site!

Light It Up

Time:  3 hours
Cost:  $
Difficulty:  9/10
Overall Ranking:  2/10

Light – such an interesting concept – can be bright, pure, and good, but also scorching, blinding, and flickering.  For example, when I am doing homework or the power goes out or I have huge bags under my eyes, I need some lighting.  But, when my alarm beckons me out from my warm cocoon of covers in the morning, light is a no-go.

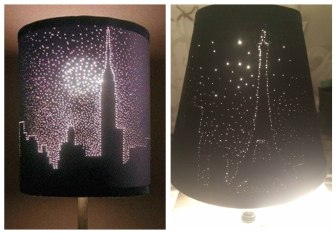
Even more interesting still is the lack of light that shadows life into the twilight.  There’s a song by For King and Country with the lyrics, “Everything in sight was lost in silhouette.”  I love silhouettes of cities, like the city skyline right at sunrise.  When I was scrolling through Pinterest this week in search of a lantern/lamp DIY project, I found the lamp of the New York City skyline.  As much as I love it, I wanted to make it my own, and so, I decided to do a variation of the original pin by doing the silhouette of Paris.

lanterncollage

I picked out a classy, little black lamp from Walmart and printed off the outline of Paris.  First, I painted the inside of the lampshade black.  I don’t know why I did that, but it was in the instructions in the original pin.  I cut out sections of the skyline and taped it around the lampshade.

Take a pin, preferably with a larger top, and stab the outline of the city.  Also, add more holes around the buildings, leaving only the silhouette skyline without the little pin holes.  The thicker the pin, the more the city will stand out.

I originally tried to use a screw.  Do you know how hard it is to get a screw out of a lampshade?  I wouldn’t recommend, and, thankfully, no one was around to see that side of me.

Stabbing the shade takes quite a bit of time, so I decided to listen to old Anastasia songs and Family Force 5.  Once, you finally are happy with the progress of your lampshade, the light will probably burn out because it takes forever, or at least mine did.

I would not recommend this project because the detail of the buildings are not as pronounced as they looked in the pin.  The pin looks more magical, where mine appears to be very DIY and tacky.  It took a while to make the project relative to the lack of elegance in the outcome.  I also did not like sticking the pin into the shade, time after time.  For each of these reasons, I ranked the project pretty low.

Do you know how I could have improved this project?  Have you had some Pinterest fails?  Let me know in the comments section, or follow me on Facebook for all my rankings.

Fall Wreaths and What-Knot

Time:  1 hour
Cost:  $
Difficulty:  2/10
Overall Ranking:  7/10

Remember my compulsive fondness over the inanimate texture and versatility of twine?  THE TWINE HAS BEEN REVIVED FOR THIS BLOG.  I would say my love for twine is just one of the many ways I would describe my dreams and passions.  But, ultimately, I would describe myself as a ‘Merican beauty.

fallwreath1

There’s this song Drew Holcomb literally wrote for me, and, in the second verse, he describes me by saying, “She was déjà vu/She was a catch-22/She was an American beauty.”  It’s like he knows me better than I know myself, ya know?

That rustic, deep voice from Holcomb never fails to make me crave everything fall – bonfires, worn-out boots, and the satisfaction of stepping on a crunchy leaf.  And, what’s more representative of a cozy autumn season than the warm welcome of a fall wreath?

So, today, I created my own fall wreath for the front door of my apartment, and it’ll make you want a pumpkin spice latte it’s so great.  I don’t even like lattes.

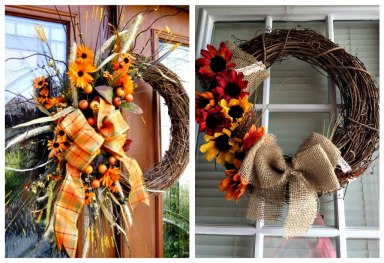
fallwreathcollage

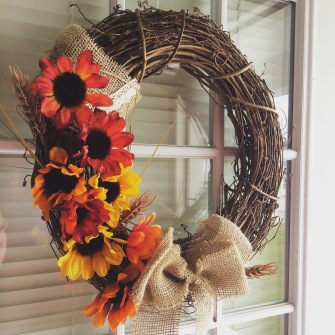
Basically, all this project entails is a productive trip to Walmart and some creativity.  Pick out a wreath for the base, colorful flowers, burlap, and lace.  Make sure to grab floral wiring to tie the flowers to the wealth.  Otherwise, in my situation, the barn sparrows that typify my Midwestern home would steal my flowers like they stole my Barbie toys, but that’s a completely different story.  You might consider adding a chalkboard sign or small pumpkins to your wreath as well.

First, I made a bow from the burlap, which is not that difficult.  Check out the instructions that I used, and you’ll be good to go!  Burlap, unfortunately, comes apart as easily as me when watching Rom-Coms, so watch out for that.

loverosie

Chop the flowers from their plastic stem, and jab them nicely into the sides of the wreath.  Add extra texture to the project by adding smaller flowers, lace accents, or small twigs.  I prefer to add all of my decorations on one side of the wreath to avoid clutter.

Use a wreath hanger to sling the décor over your front door, and you’ll always be expecting to smell warm fall-scented candles every time you come home.  Ah, yes, to be young and in fall.  This project is inexpensive and very easy to personalize.

Have you done any fall projects lately?  Tell me all about them in the comments section, or stay up-to-date with my projects on my Facebook page!

Canvas Painting 101

Time:  3 hours
Cost:  $$
Difficulty:  7/10
Overall Ranking:  9/10

Here’s to the twilight.  Here’s to the memories.  Here’s to the dreams we had that tried and died.  But, do they really?

canvaspainting1

I believe in dreams – the crazy, the sane, big, small, and completely obnoxious.  When I was younger, I thought dreaming never stopped in the limitless capacity of radical imagination.  There’s a song by Switchfoot called Souvenirs that reminds me of a lyrical photograph.  I wonder, then, what would happen if we could keep every unlimited, impossible dream that now just seem like a souvenir in a realistic, grown-up, ever-busy life.

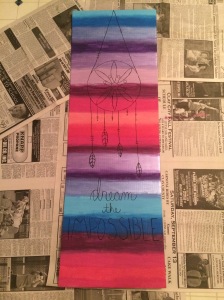
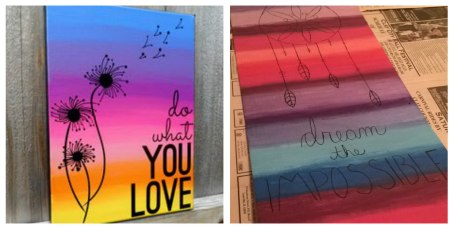
These deep nightmarish thoughts are what inspired by DIY canvas painting this week.  I’ve painted in the past, dandelions and arrows, but I chose the dream catcher for the first time on this project.  I was originally inspired by an ombre-like painting, produced by Silhouette Blog, but modified it to make it my own.

paintingcollage

For my canvas, I used the poster board from a Hobby Lobby artbeat poster.  As much as I love the obsessive Paris products from the poster company, I’m a fan favorite of the partnered cardboard backing for paintings.  I dug up some of my old paints, which have been around since placing in the seventh grade science fair and making homemade dollhouses in high school (class projects, I promise).

I lined up some of my favorite colors by shade and smeared them across the cardboard canvas like a 3-year-old with lipstick.  The greatest tip for this project is overlaying colors for them to blend in a fading effect.  I had a brush for each color and would, at times, revert back to the previous color if more blending was needed.  It doesn’t matter what it really comes out like if it’s the colors you like and the design you choose.

After, I decided on a design and motto by, of course, scrolling through Pinterest.  I traced a sewing hoop and a coin with a pencil for the circles of the dream catcher.  I suggest drawing the design in pencil because we are imperfect beings, and there is no way my project would come out centered the first time.  Then, I got a thin paintbrush and carefully traced over the pencil.

Vitally important information:  Do not sneeze during this process.

The biggest aspect of this project is simply self-expression.  If you like the way a technique looks, use it.  If you prefer other colors, use them.  If you want to add your own motto and design, go for it.  Don’t limit your capacity to what looks difficult or by your own self-motivation.  The bigger you dream, the bigger person you become.

I gave the canvas painting a high rating because this is a personalized artwork I can hang in my apartment.  I love the colors and the fact I made it myself.  However, blending the colors is quite difficult, and I thought making the dream catcher was complicated for someone who hadn’t drawn one before.  Overall, I would encourage pinners to try this as well for a personalized and fun souvenir of Pinterest!

Supernova Mosaic Serving Plates

Time:  4 hours
Cost:  $
Difficulty:  5/10
Overall Ranking:  8/10

Some people are just the life of the party – cue Boys Like Girls – and I’m most definitely that person.  Kinda.  Sometimes.  Maybe.  LOL.  #introvertprobs

mosaicplate1

But, even if that’s not always the case, everyone needs a little sparkle in his or her life every so often.  Without fun, we would have never experienced the Framers overthrowing the Articles like they own the place, the People of Walmart (No, I’m not linking to something that could be inappropriate for some readers), or Zenon leaving her space station to finally be on Earth and eventually save the station from collapse and the world ending.  You could say she’s a Supernova Girl, but don’t go to extremes.

For your listening enjoyment, please check out this song from the Disney Channel Original Movie, Zenon: Girl of the 21st Century (on Youtube by MoonlightS27).  You won’t be disappointed because it’s Protozoa, and you won’t understand my blog without it.

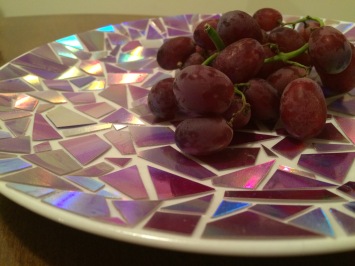
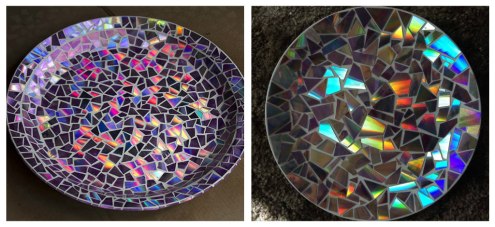
This week, I was heavily inspired by interplanetary, megastellar, hydrostatic mosaics on Pinterest from broken DVDs.  While there are options for these projects on necklaces, mirror frames, and bird baths, I wanted to be the life of the actual party.  What better way to get everyone to love you than food?  So, I created my own invention – a mosaic serving plate – a truly Technicolored world.

mosaicplatecollege

All you need for this project is clear tacky glue, a pack of DVDs, and a white serving plate.  I also grabbed some clear acrylic sealer to protect it because I didn’t want to be eating shards of DVDs, but that’s just me.  When I first started the project, I was trying not to scratch the discs with my nails, and I tried to bend the discs to break them.  DVDs are literally more flexible than ever imagined.  Like, what’s in those?  Neo?  (That’s a Matrix joke.)

Don’t bother trying to bend the discs to break them.  Take a pair of sharp scissors and cut the discs in half with some elbow grease that you may or may not have.  DVDs are actually layered discs, so, once cut in half, peel the two layers apart.  This is similar to separating Oreos because you have to get the shiny pieces to stick on one layer, but it doesn’t always work, and then you are stuck with half on each.  It’s a rough life.

Once the layers are separated, it’s easier to cut the discs.  Use the tacky glue to puzzle them out on the plate.  This is a long process, but, in the end, it’s absolutely gorgeous.  Although the project was one of the longest to complete thus far in my blogging experience, I really love the bold statement and stunning outcome.  The project was not too difficult because, since it’s a mosaic, it’s a little easier to correct mistakes.  I would definitely recommend putting sealer over the plate to protect the DVD pieces as the color will scratch off.

In the end, if you’re looking for a showstopper DIY project for your next get-together or you want an “out-of-this-world” creation for your cupcake treats, don’t let gravity get in the way of your mosaic plate aspirations.

Twine, Burlap, and Window Hangings

Time:  2 hours
Cost:  $$$
Difficulty:  4/10
Overall Ranking:  9/10

Heaven is among us in the form of thrifting.  Lately, DIY and thrifting is all the trend when pinners refurbish a piece of furniture.  Turn drab to fab just as easily as infomercials.   Needless to say, I love picking up old furniture from antique malls and revamping them.  My favorite pin right now are flipped window hangings.

WindowHanging1

Full disclaimer:  I have, in fact, flipped a nightstand before (check out my past DIY projects to the right).  However, I never used painter’s tape (tape is actually much trickier than just sticking it down, by the way), and this week’s project was my first time flipping a window.

windowcollage

Why a window?  Well, Maroon 5 just says tap on it, and you’ll feel beautiful.  That’s why.

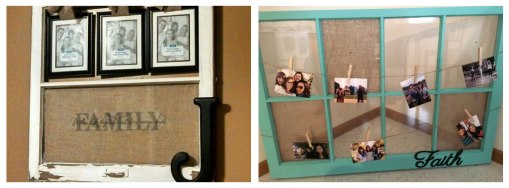
I found my baby (as I am now sincerely attached to my window) at Lawson Hill Antique Mall in Kirksville, Missouri.  In case you’re in the area, I found it to be helpful and full of lovely, charming little trinkets.  I picked out a white, peeling, chipped window from among the trove.  Next, I headed over to a home improvement store for supplies, picked out the most chipper shade of aquamarine, and sprawled everything out at my apartment.

All one really has to do in flipping furniture is clean off the furniture, sand (if needed), and paint.  Since this was a window, I needed painter’s tape.  After the coldest morning in my exaggerated history, when I almost lost my fingers to the October frost, I finally painted a semi-attractive window.  Although I love the color, my painting job is only decent at best, so maybe be more careful rather than freezing to death when putting on painter’s tape.  I also didn’t have much experience with painter’s tape, but the gist is to try to get the edges to line up without overlap with what needs to be painted.

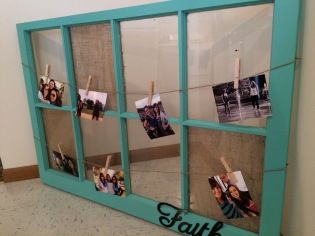
Then, I threw on some burlap, twine, clothespins, and pictures.  Watch out for the burlap if you’re wearing a sweater; it’ll getcha.  The twine, on the other hand, I wonder if I could make a sweater out of my beloved twine.

Whatever you think looks good, you do it.  You do you.  And let me know how it turns out.   I personally did not fully love some of the Pinterest ideas, so I made my own design from scratch.  This is a step I would definitely encourage to be personalized to add to the project overall.

I loved this DIY project because it was so easy, and the project looks stellar!  My DIY window hanging is personalized to what I will use for years to come.  Although it may be difficult to find furniture at a reasonable price, check out some of your own local thrift stores because you never know exactly what you will find to personalize!

And maybe if I tap on my DIY window enough times, Adam Levine will show up in my kitchen.

adam levine